還蠻有趣的真的!
之前在台北有用過,
但是那時是用 ddwrt 內建的功能,
點一點就配置好了!
以下是以我前幾天申請了hinet ipv6來玩,
現在申請比以前簡單很多,
http://www.ipv6.hinet.net/,
有線上申請的連結!!
點一點就有了(而且幾乎是馬上),
手癢把之前改裝成 router 的 raspberry pi 2,
增加了 SLAAC 功能,
步驟如下:
1. 開啟 ipv6:
編輯 /etc/modules 加入一行 ipv6
2. /etc/ppp/options: 增加這行 +ipv6 ipv6cp-use-ipaddr
3. 裝完 wide-dhcpv6-client (安裝過程會問你要監聽哪個介面,記得改成 ppp0), 編輯 /etc/wide-dhcpv6/dhcp6c.conf
interface ppp0

{

send ia-pd 0;

script "/etc/wide-dhcpv6/dhcp6c-script";

};

id-assoc pd 0 {

prefix-interface eth0 {

sla-len 0;

};

};
這是要從 isp 那邊拿到配發的 prefix.
4. 裝完 radvd 編輯 /etc/radvd.conf (公告ra用的)
interface eth0

{

  AdvSendAdvert on;

  AdvManagedFlag off; //由ra取得prefix然後自己組合產生ipv6位址

  AdvOtherConfigFlag on; //dns等其他資訊由 dhcpv6 拿

  AdvLinkMTU 1492;

  MinRtrAdvInterval 3;

  MaxRtrAdvInterval 10;

  prefix ::/64 {

    AdvRouterAddr on;

    AdvOnLink on;

    AdvAutonomous on;

  };

};
dns 部分本來我是設定 rdnss 不過 windows 沒支援…
mac os x 10.10 倒是有.
5. 裝完 wide-dhcpv6-server 編輯 /etc/wide-dhcpv6/dhcp6s.conf
option domain-name-servers 2001:b000:168::1 2001:b000:168::2 2001:4860:4860::8888 2001:4860:4860::8844;
option domain-name “xxx.org”;
第一個就是列出 dns 位址, 前兩組是 hinet 後面是 google的.
option domain-name, dns 尾碼, 設定之後, client 比如只打 www,
如果 dns 查不到,
為自動補完變成 www.xxx.org.
wide-dhcpv6-server 這個東西要不要配置其實無所謂,
因為其實hinet 他的 ipv4 dns 可以查得到反解成 ipv6 的位址,
所以就算沒有ipv6的 dns,
還是照常可以查詢,
我會知道是因為沒有設定 ipv6 dns,
nslookup 可以看到是到 ipv4 dns 查的.
6. 編輯 /etc/sysctl.conf
net.ipv6.conf.all.forwarding=1
net.ipv6.conf.default.forwarding=1
net.ipv6.conf.all.accept_ra=2
net.ipv6.conf.default.accept_ra=2
下面要設定 accept_ra 的原因是如果不這樣
ppp0 就拿不到 ip 了.
7. 編輯 /etc/ppp/ipv6-up 最後加入
service wide-dhcpv6-client start
service radvd start
service wide-dhcpv6-server start
配置完我是直接重開-_-!
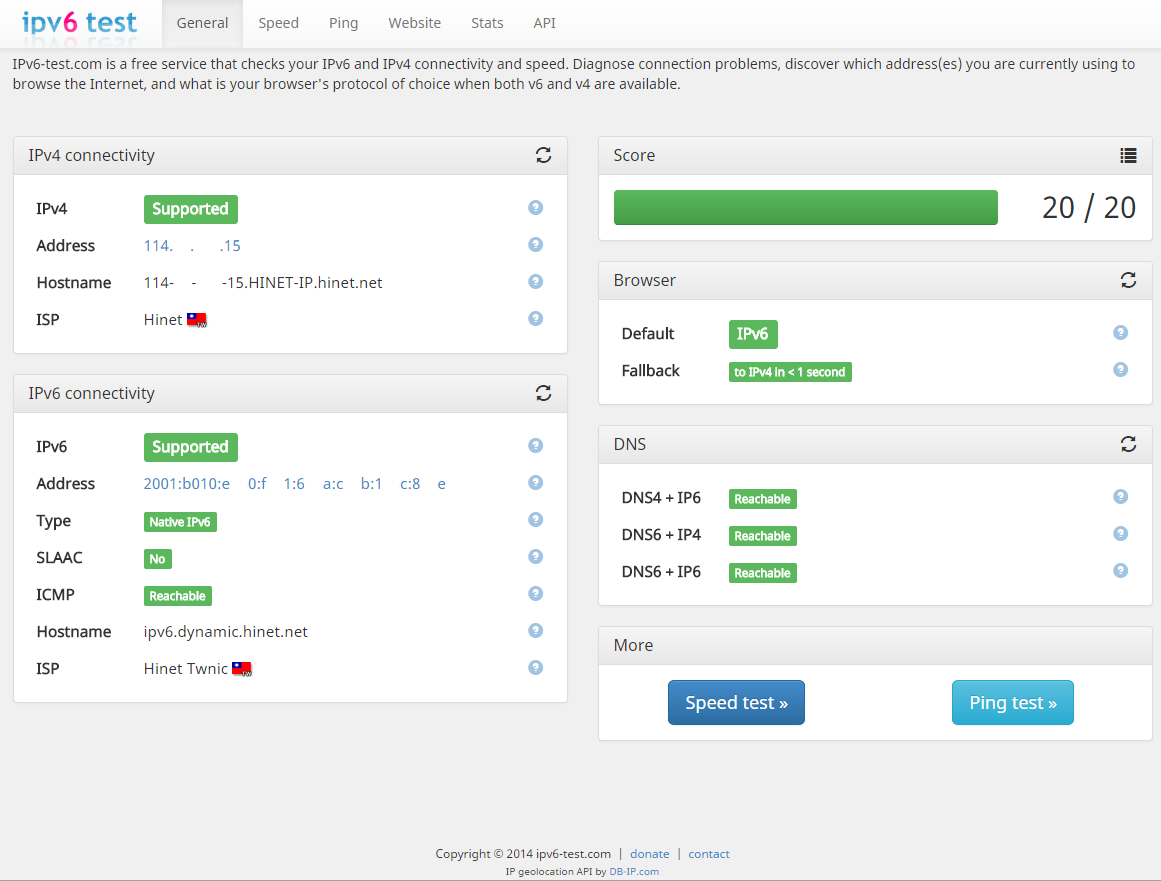
然後就完成啦!!
看似輕鬆完成,
其實我研究了整整兩天= =!!
因為要看很多資料,
還要知道 hinet 怎配的…